 Pin It
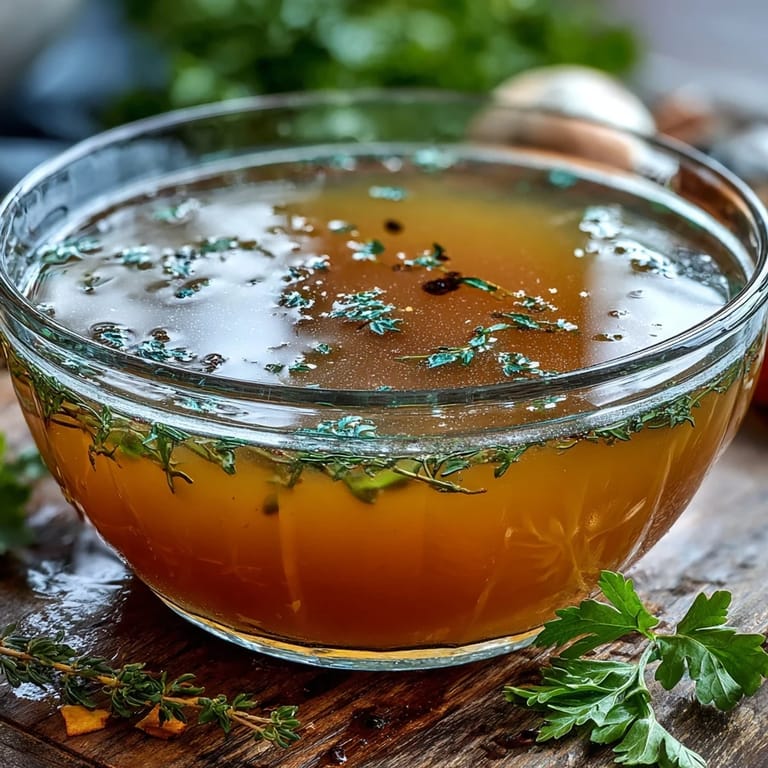
 My grandmother kept a small container in her freezer labeled simply "scraps," and I didn't understand it for years. One winter afternoon, when unexpected guests arrived and my fridge felt bare, she pulled out that humble container and transformed it into something golden and alive—a broth that filled the kitchen with warmth I couldn't quite name. That's when I realized some of the best things come from what we almost throw away. Homemade vegetable broth became my secret too, and now I can't imagine cooking without it.
I made this broth during a particularly quiet period of my life, and something about the gentle simmering became my meditation. My neighbor smelled it from across the hallway and asked if she could learn—now we save scraps together and take turns making enormous batches. That first shared pot became a small ritual we looked forward to, proof that even the simplest cooking creates connection.
Ingredients
- Vegetable Scraps: Aim for 4 cups of assorted trimmings like carrot peels, onion skins, celery ends, leek tops, and mushroom stems—these are the backbone of your broth and cost you nothing since you'd normally compost them.
- Bay Leaf: This single leaf works quietly in the background, adding earthiness and a subtle sophistication that elevates the whole pot.
- Black Peppercorns: Use 5 to 7 whole peppercorns for gentle spice without overwhelming delicate vegetables; crushing them slightly helps release their flavor.
- Garlic: Two crushed cloves bring warmth and depth, though this is optional if you prefer a more neutral base.
- Salt: Start with just a teaspoon and taste as you go, especially if you're planning to use this broth in other recipes where salt will accumulate.
- Fresh Thyme or Dried: A single sprig of fresh or half a teaspoon of dried thyme adds a gentle herbaceous note without dominating.
- Cold Water: Eight cups ensures everything stays submerged and gives you a full 2 liters of finished broth.
Tired of Takeout? 🥡
Get 10 meals you can make faster than delivery arrives. Seriously.
One email. No spam. Unsubscribe anytime.
Instructions
- Gather Your Scraps Thoughtfully:
- Collect clean vegetable trimmings in a bowl—carrot peels, onion skins, celery ends, leek greens, mushroom stems, and herb stems are all welcome. Avoid potato peels, brassicas like broccoli or cabbage, and overly starchy vegetables, as they'll cloud your broth or add bitterness that muddles the flavor.
- Layer Flavors Into the Pot:
- Add your scraps to a large stockpot along with the bay leaf, peppercorns, crushed garlic, salt, and thyme. There's something satisfying about watching all these humble pieces come together before the water even hits the pan.
- Cover Everything and Start Gently:
- Pour in the cold water, making sure every scrap is submerged beneath the surface. Bring everything to a boil over medium-high heat, then immediately turn it down to a gentle simmer—you want barely a ripple, not a rolling boil.
- Skim and Simmer Patiently:
- Let the broth simmer uncovered for 45 to 60 minutes, occasionally skimming off any foam that rises to the top with a ladle. This step matters more than you'd think; removing the foam keeps your broth clear and clean-tasting rather than murky.
- Taste and Fine-Tune:
- After about an hour, give it a taste and adjust seasoning if needed—you might want a pinch more salt or a few more peppercorns depending on how concentrated the flavors have become.
- Strain Without Hesitation:
- Pour the broth through a fine-mesh sieve or cheesecloth into a clean container, letting gravity do most of the work. Don't press down on the solids; just let the liquid flow through naturally for clarity.
- Cool and Store Wisely:
- Let the broth cool to room temperature before covering and refrigerating, where it will keep for up to five days. For longer storage, freeze it in ice cube trays or containers for up to three months—future you will be grateful.
 Pin It
  Pin It
 The first time I served this broth to a friend who was fighting a cold, she took one sip and her shoulders actually relaxed. She asked if it was store-bought because she'd never tasted anything so clean and nourishing—I didn't tell her it came from scraps I was about to discard. That moment made me understand that sometimes the most valuable things are invisible until someone shows you how to look.
When to Roast Your Scraps for Extra Richness
On days when you want a deeper, more caramelized flavor, spend 20 minutes roasting your vegetable scraps in a 200°C oven before simmering them. The heat transforms them into something almost sweet, and your broth will taste like you've been tending it all day instead of just an hour. This small step elevates broth from practical to something you'd actually want to sip on its own.
The Umami Secret Nobody Talks About
If you want to add another layer of complexity without fuss, drop a small piece of kombu seaweed or a handful of dried mushrooms into the pot during the simmer. They dissolve into the broth invisibly, leaving behind an umami depth that makes people pause and ask what's different about your cooking. It's the kind of secret that feels like you're letting someone in on an insider's trick.
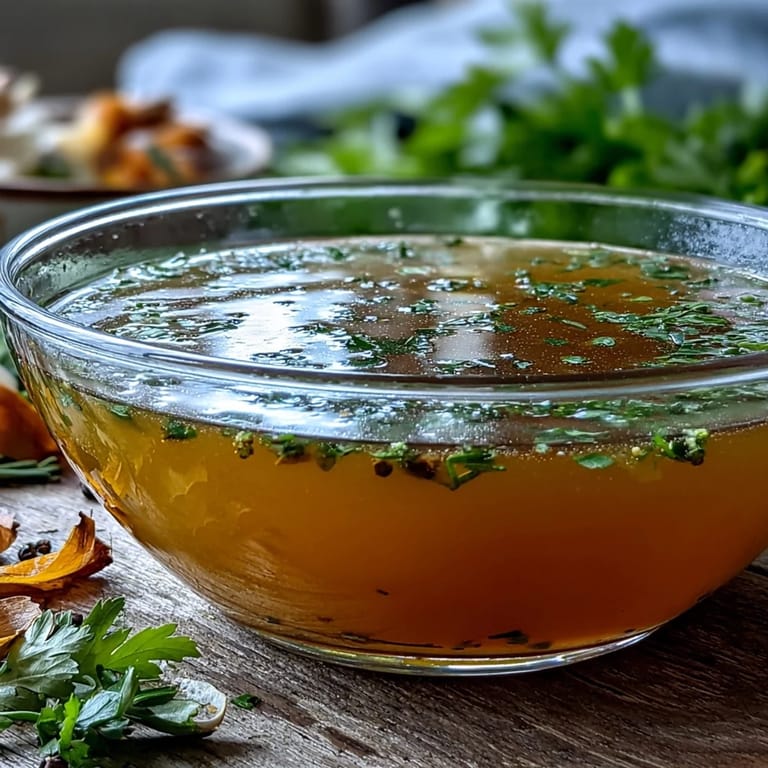
How to Use Your Liquid Gold
This broth is endlessly versatile—use it as the foundation for soups and stews, cook grains and risotto in it for subtle flavor, or simply warm a mug and sip it like tea when you need something grounding. Some mornings I heat a cup with a squeeze of lemon and feel like I've given my body something real and honest. Try it in your favorite recipes anywhere water or store-bought broth would normally go.
- Use as a base for minestrone, French onion soup, or any broth-based dish where clean vegetable flavor shines.
- Cook rice, quinoa, or other grains directly in it for an understated depth that builds throughout the meal.
- Start freezing it in ice cube trays so you always have a small amount ready for quick cooking needs.
 Pin It
  Pin It
 Making broth from scraps taught me that good cooking isn't always about fancy ingredients or complex techniques—sometimes it's just about paying attention to what you already have. Every time I use this broth, I think of my grandmother's mysterious container and smile.
Recipe Questions & Answers
- → What vegetable scraps work best for broth?
Carrot peels, onion skins, celery ends, leek tops, mushroom stems, parsley stems, and garlic skins create the most flavorful base. Avoid potato peels and brassicas like broccoli or cabbage, which can add bitterness.
- → How long can I store homemade vegetable broth?
Refrigerate in airtight containers for up to 5 days, or freeze for up to 3 months. Cool completely before storing to maintain freshness and quality.
- → Can I enhance the flavor of my vegetable broth?
Yes! Roast the scraps at 200°C (400°F) for 20 minutes before simmering for deeper flavor. Add kombu or dried mushrooms for umami richness, or fresh herbs like thyme for aromatic complexity.
- → Should I salt the broth while cooking?
Add minimal salt during cooking if using the broth as a base for other dishes. You can always season individual recipes later. For sipping, adjust salt to your preference after straining.
- → What can I use vegetable broth for?
Use it as a base for soups, stews, risottos, cooking grains, braising vegetables, or deglazing pans. It also makes a warming, nourishing drink on its own.
- → Why should I avoid certain vegetables in broth?
Potato peels add excessive starch and cloudiness, while brassicas like broccoli, cauliflower, and cabbage contribute bitter, overpowering flavors that can overwhelm the delicate balance of the broth.