 Pin It
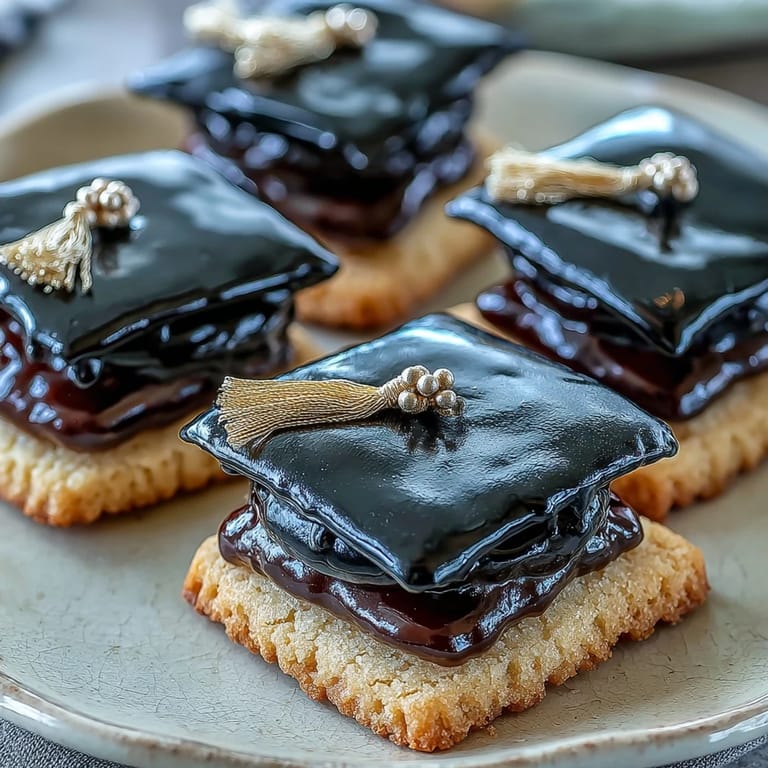
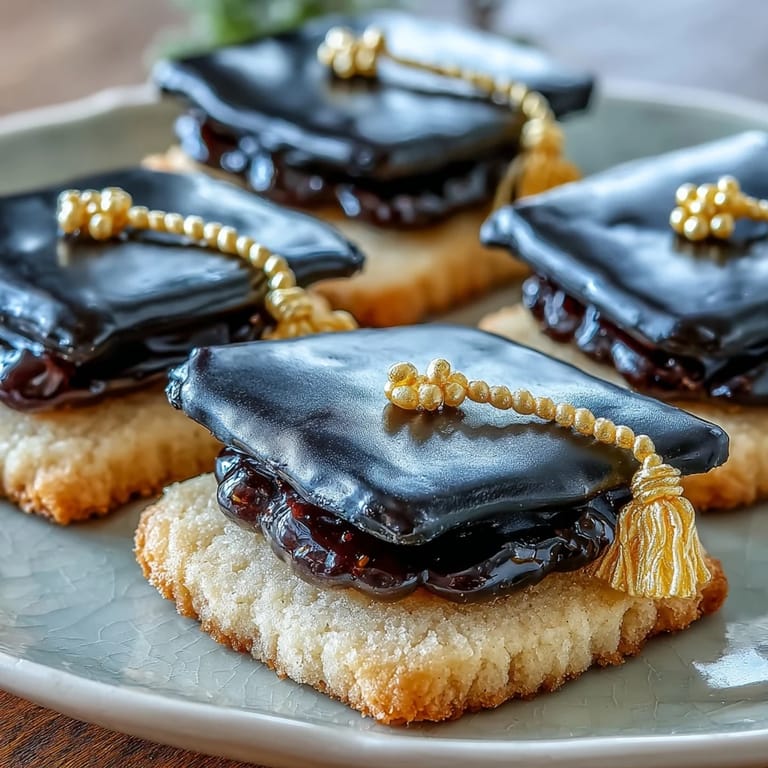
 My neighbor texted me a photo of her daughter's graduation cap at midnight, and I found myself wide awake thinking about how to make the celebration edible. By morning, I'd sketched out these cookies—buttery sugar cookies dressed up as tiny mortarboards with royal icing so smooth it almost looks official. They became the thing people remembered more than the cupcakes, which felt like a small victory in the kitchen. There's something about turning a milestone into something you can hold and taste that makes it real in a different way.
I made a batch for a impromptu porch gathering last spring, and watching people's faces light up when they realized the caps were edible made me understand why this recipe stuck around. A kid actually asked to take a photo before eating hers, which had never happened to me before with cookies. That moment—when food becomes memory before it becomes a snack—that's when I knew this recipe was worth keeping around.
Ingredients
- All-purpose flour (2 1/2 cups): The backbone of your cookies, and sifting it with the baking powder keeps everything tender and light.
- Baking powder (1/2 teaspoon): Just enough lift to give these cookies a delicate crumb without making them cake-like.
- Salt (1/4 teaspoon): Brings out the butter flavor and balances the sweetness in ways you won't notice until it's missing.
- Unsalted butter (3/4 cup), softened: Room temperature is non-negotiable here—cold butter won't cream properly and you'll end up with dense cookies instead of tender ones.
- Granulated sugar (1 cup): The sweetness that makes these feel celebratory, and the grinding action helps cream the butter into submission.
- Large egg (1): Binds everything together and adds richness to the dough without making it greasy.
- Vanilla extract (2 teaspoons): Use real vanilla if you can—the flavor shows up in subtle ways that make people pause and wonder what makes these taste different.
- Powdered sugar (3 cups), sifted: The base of your royal icing, and sifting prevents lumps that would make your decorating go bumpy.
- Egg whites (2 large) or meringue powder with water: Meringue powder is the safer choice if you're nervous about raw eggs, and it works just as beautifully.
- Black and yellow gel food coloring: Gel coloring is thicker than liquid, so it won't thin out your icing the way regular food coloring does.
- Mini yellow M&Ms or candy pearls: These become the tassel finish, and they add a real touch of celebration to each cap.
Tired of Takeout? 🥡
Get 10 meals you can make faster than delivery arrives. Seriously.
One email. No spam. Unsubscribe anytime.
Instructions
- Gather and measure everything first:
- Mise en place might sound fancy, but it just means having everything ready before you start, which prevents that panicked moment when you realize you're out of vanilla halfway through mixing. I learned this after ruining a batch by having to substitute, so trust me on this one.
- Cream the butter and sugar until it's almost cloud-like:
- This takes about three minutes with an electric mixer on medium speed, and you'll know it's right when it's pale, fluffy, and looks like whipped cream. Stop occasionally to scrape down the bowl so everything gets incorporated evenly.
- Fold in the egg and vanilla gently:
- Add them together and mix just until the dough comes together—overworking it here makes the cookies tough instead of tender. The dough should look smooth and slightly glossy.
- Add the flour mixture in stages:
- This prevents you from overworking the dough, which is the enemy of a tender cookie. Add about a third at a time, mixing on low speed until just combined before adding the next portion.
- Chill the dough wrapped and refrigerated:
- The thirty minutes gives the gluten time to relax and makes the dough easier to roll without sticking. You can even chill it longer if you need to step away—this dough is patient and forgiving.
- Roll and cut with confidence:
- A quarter-inch thickness is your target, and if you don't have a graduation cap cutter, a square one works just fine. Dusting your rolling pin with flour keeps everything from sticking to itself.
- Bake until the edges just turn golden:
- Eight to ten minutes at 350 degrees is the sweet spot where the cookies are set but still tender in the middle. They'll continue cooking slightly on the baking sheet after you pull them out, so don't overbake or they become brittle.
- Make the royal icing in a clean bowl:
- Any oil or yolk in the bowl will prevent the egg whites from reaching stiff peaks, so wash thoroughly beforehand. Beat until the peaks stand up straight and glossy, which takes about five minutes with an electric mixer.
- Color and thin your icing strategically:
- Black icing for the base floods more easily if it's slightly thinner, while yellow for the tassel works better when it's a bit stiffer. Add water just a teaspoon at a time so you don't overshoot the consistency.
- Outline first, then flood the cookies:
- The outline creates a little dam that keeps the flooding icing from running off the edges. Use a toothpick to gently nudge the icing toward corners and smooth out any bubbles.
- Let the base icing set before adding the tassel:
- Thirty to sixty minutes is usually enough, and you'll know it's ready when you can touch it without it feeling sticky. Trying to pipe yellow on top of wet black icing is a recipe for muddy colors, so patience here pays off.
- Pipe the tassel and cap button with precision:
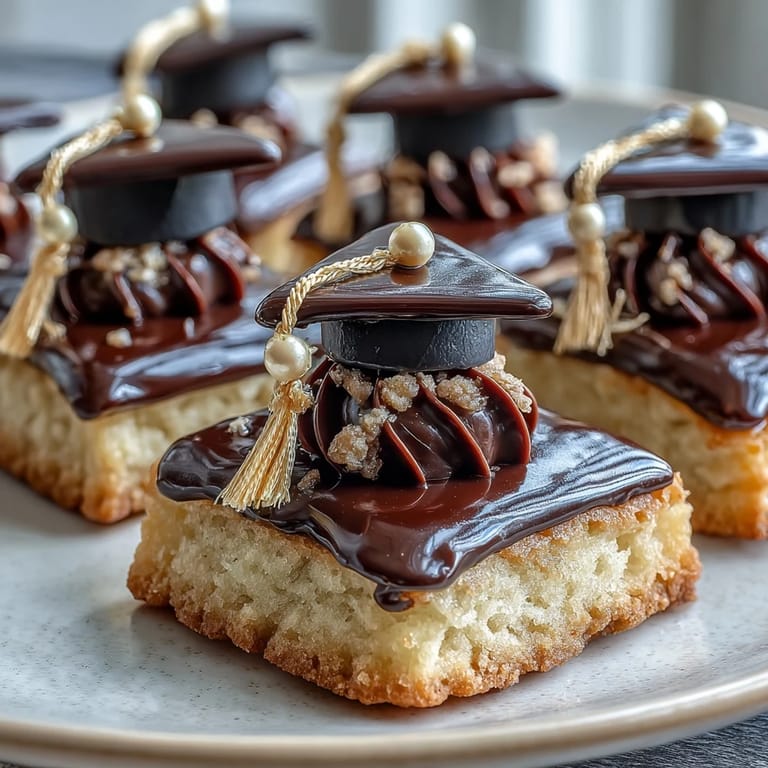
- Small piping bags with round tips give you the most control, and a steady hand comes from going slowly rather than rushing. Top each tassel with a mini M&M or candy pearl for that final celebratory touch.
- Dry completely before packaging:
- Several hours or overnight is ideal, and the cookies can be stacked once they're fully set. Store in an airtight container with parchment between layers so they don't stick together.
 Pin It
 There was a moment when a college student bit into one of these at her graduation party and said it tasted like someone actually cared, which sounds dramatic for a cookie but somehow felt true. Maybe it was because these aren't complicated or pretentious, just thoughtfully made and dressed up for an occasion that mattered.
The Secret to Tender Cookies
The difference between a tender cookie and a hard one comes down to three things: softened butter that creams properly, not overworking the dough, and pulling them out of the oven while the edges are just golden. I used to think underbaking was risky, but cookies continue to cook on the hot pan after you remove them, so that golden edge means the center is actually perfectly set. Timing feels finicky at first, but after a few batches your eyes learn what "just right" looks like.
Working with Royal Icing Without Stress
Royal icing has a reputation for being temperamental, but it's really just asking you to respect two things: clean equipment and patience with consistency. If your icing won't reach stiff peaks, even a tiny speck of egg yolk or oil in the bowl will sabotage you, so wash with hot soapy water and dry thoroughly. The consistency matters too—flooding icing and piping icing are different textures, and getting this right is what separates shaky decorating from smooth finishes.
Make-Ahead Strategy and Storage Tips
The timeline flexibility is honestly the best part of this recipe because you can bake the cookies two days ahead and decorate whenever works for you. This is clutch during graduation season when your calendar is chaos and you want homemade but don't have four hours to spend decorating. Once the cookies are completely dry, they stay fresh in an airtight container for about a week, and they look impressive enough that people forget they're eating something you made at home.
- Bake cookies up to two days ahead and store them in an airtight container at room temperature, away from humidity that might soften them.
- Decorate on the day you plan to serve them, or the night before if you need that time buffer.
- Royal icing hardens completely after several hours, so patience with the drying time means your cookies won't smudge or transfer color during handling.
 Pin It
 These cookies taste like butter and vanilla and celebration, which is exactly what you want when you're marking someone's big moment. Make them for graduations, promotions, or any excuse to turn something ordinary into something memorable.
Recipe Questions & Answers
- → What gives the cookies their crisp texture?
The combination of softened unsalted butter and granulated sugar creamed together, along with precise baking times, results in crisp, tender sugar cookies.
- → How is the royal icing prepared for decorating?
Whisk egg whites or meringue powder with powdered sugar and vanilla until stiff peaks form, then tint portions with gel colors for piping and flooding.
- → What is the recommended dough thickness for cutting cookies?
Roll the dough to approximately 1/4-inch (6 mm) thickness for even baking and proper cookie shape retention.
- → Can these cookies be made ahead of time?
Yes, the cookies can be baked up to two days in advance and decorated the next day for optimal freshness and decorating ease.
- → How do I achieve vibrant colors in the icing?
Use gel food coloring to tint the royal icing, which provides bright, concentrated colors without altering consistency.