 Pin It
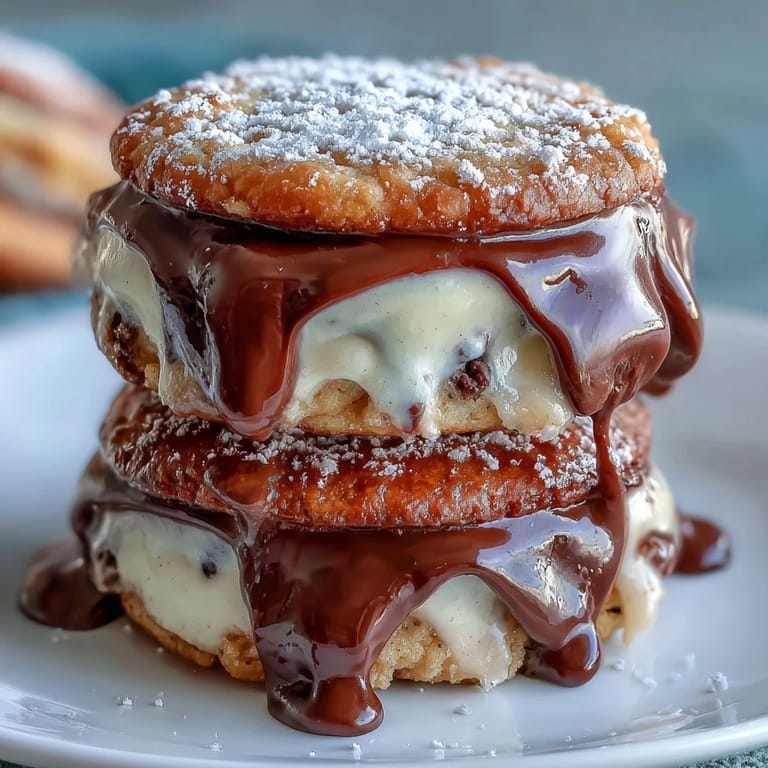
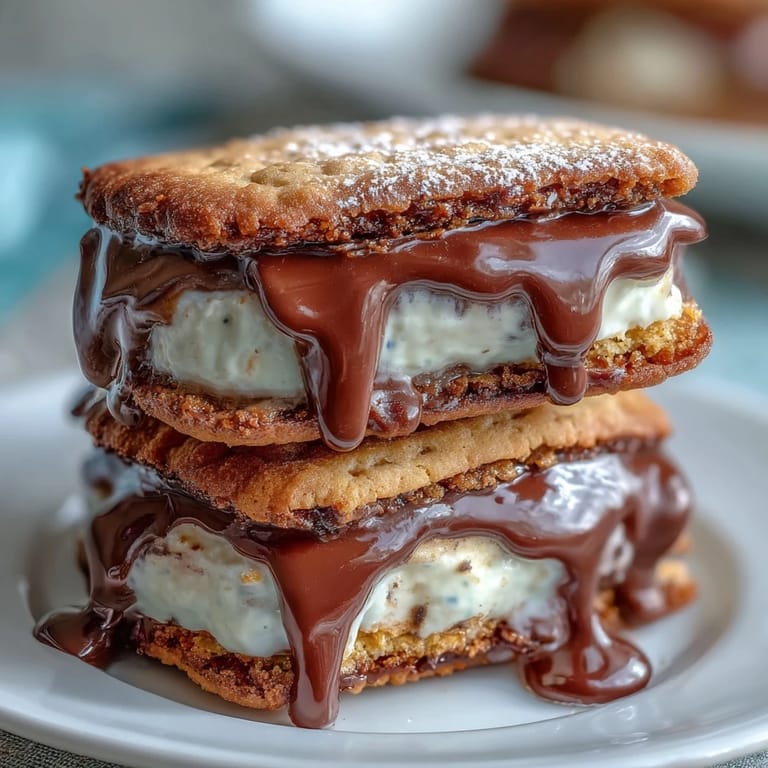
 I stumbled onto these cookies while watching my nephew play Cookie Run Kingdom, mesmerized by the adorable milk cookie character with its cloud-like frosting. He kept insisting I recreate them, so one lazy Sunday afternoon, I decided to give it a shot. What started as a silly challenge became my go-to recipe for bringing smiles to people's faces. These delicate sandwich cookies are surprisingly simple to make, with a tender crumb and silky vanilla cream that tastes just as good as they look.
My sister showed up unannounced one evening, and instead of panicking about having nothing to offer, I pulled out a batch of these from the freezer. The moment she bit into one, her eyes lit up in that way that makes all the baking mishaps worthwhile. She sat at my kitchen counter asking questions about every step, and by the third cookie, she was already planning when she'd make them for her own kids.
Ingredients
- All-purpose flour (2 cups): This is your foundation, so measure it properly by spooning into your measuring cup rather than scooping directly from the bag, which packs it down and throws off your ratios.
- Unsalted butter (1/2 cup for dough, 1/4 cup for filling): Softening it to room temperature matters more than you'd think because cold butter won't cream properly and you'll end up with dense cookies instead of tender ones.
- Granulated sugar (2/3 cup): The sweet base that makes these cookies melt on your tongue without being overpowering.
- Large egg (1): This binds everything together while adding a subtle richness that makes the texture almost cake-like.
- Milk (2 tbsp for dough, 1 tbsp for filling): Just enough to add moisture and a gentle dairy note that reminds you why they're called milk cookies.
- Vanilla extract (1 tsp for dough, 1 tsp for filling): The soul of both components, so don't skip it or substitute with cheaper extracts that taste like chemicals.
- Baking powder (1/2 tsp): A gentle leavening agent that helps these cookies puff up slightly without becoming cakey.
- Salt (1/4 tsp): A tiny pinch that balances the sweetness and makes all the vanilla flavors sing.
- Powdered sugar (1 cup sifted): Sift it before measuring because unsifted powdered sugar contains air pockets that throw off your cream consistency.
Tired of Takeout? 🥡
Get 10 meals you can make faster than delivery arrives. Seriously.
One email. No spam. Unsubscribe anytime.
Instructions
- Heat your oven and prepare:
- Set your oven to 350°F and line two baking sheets with parchment paper so your cookies slide off easily without sticking. This single step prevents frustration later.
- Mix the dry ingredients:
- Whisk together flour, baking powder, and salt in a bowl, breaking up any tiny lumps of baking powder. This ensures your cookies bake evenly without any bitter pockets.
- Cream butter and sugar:
- Beat softened butter and granulated sugar together for about two to three minutes until the mixture turns pale and fluffy, almost cloud-like. This is where the magic starts, as you're incorporating air that makes the cookies tender.
- Add the wet ingredients:
- Beat in your egg, then the milk and vanilla, mixing just until everything looks combined and smooth. Don't overbeat at this stage or you'll toughen the dough.
- Bring it all together:
- Gradually add your dry ingredients to the wet mixture, stirring gently until a soft dough forms without any streaks of flour. The dough should feel soft and slightly sticky but still manageable.
- Shape and flatten:
- Roll the dough into one-inch balls and place them two inches apart on your prepared sheets, then gently press each ball with your palm or the bottom of a glass until they're about a quarter-inch thick. Don't press too hard or they'll spread unevenly during baking.
- Bake until golden:
- Bake for ten to twelve minutes until the edges are just turning golden but the centers still look slightly soft. They'll continue cooking on the hot pan for a minute after you remove them from the oven.
- Cool completely:
- Let the cookies cool on the baking sheet for a few minutes, then transfer to a wire rack to cool completely before filling. This prevents the cream from melting and the cookies from breaking apart.
- Make the cream filling:
- Beat softened butter until smooth, then gradually add sifted powdered sugar a bit at a time while mixing, which prevents lumps from forming. Once smooth, add milk and vanilla and beat until fluffy and spreadable.
- Assemble the sandwiches:
- Spread or pipe about one tablespoon of cream onto the flat side of half your cooled cookies, then top with the remaining cookies, flat side down. Press gently so the cream spreads evenly to the edges.
 Pin It
 There's something deeply satisfying about biting into a perfectly assembled milk cookie sandwich and feeling the tender cookie give way to that cloud-soft vanilla cream in the middle. My nephew now requests these for every occasion, and I've realized these cookies represent more than just a game tie-in, they're a small edible joy that brings people together.
Storage and Shelf Life
These cookies keep surprisingly well if you store them in an airtight container, staying soft and fresh for up to three days at room temperature. If you want to make them ahead, you can freeze the unfilled cookies for up to two weeks and assemble them with the cream filling just before serving, which actually makes them taste fresher.
Flavor Variations Worth Trying
While the classic vanilla version is perfect as is, I've experimented with adding two tablespoons of cocoa powder to the dough for a subtle chocolate twist that pairs beautifully with the vanilla cream. You can also infuse the cream filling with a quarter teaspoon of almond extract or a tiny pinch of rose water if you're feeling adventurous, though the vanilla purist in me still comes back to the original every time.
Decorating and Presentation Tips
The edges of these cookies are the perfect canvas for a little decoration that makes them look bakery-worthy without requiring any real skill. Roll the cream-filled sandwich edges in colorful sprinkles, rainbow nonpareils, or even crushed freeze-dried strawberries for a whimsical touch that impresses without effort.
- Dip just the cream edge into sprinkles while the cream is still slightly soft so they stick properly.
- For a more elegant look, dust the tops of the cookies with a tiny bit of powdered sugar to mimic the milk cookie's snowy appearance from the game.
- Store decorated cookies in a single layer for the first day because stacking them can smudge any toppings you've added.
 Pin It
 These milk cookies have become my answer to the question of what to bring, what to make, and what to reach for when I need a small moment of joy. Every time I pull a batch from the oven, I'm reminded that sometimes the best recipes come from the simplest inspiration, a child's gaming obsession, and the willingness to try something just because someone you love asked you to.
Recipe Questions & Answers
- → How do I achieve soft cookies with this dough?
Ensure not to overbake; remove cookies once edges turn golden but centers remain soft. Creaming butter and sugar well helps create a tender texture.
- → Can I add flavors to the cream filling?
Yes, vanilla is classic, but you can mix in cocoa powder or citrus zest for added depth and variety.
- → What is the best way to store these sweet sandwiches?
Store in an airtight container at room temperature to keep cookies tender and cream filling fresh, ideally consumed within three days.
- → Is it necessary to chill the dough before baking?
This dough doesn't require chilling, but brief refrigeration can help maintain cookie shape if the kitchen is warm.
- → How can I make the cookies thicker or thinner?
Adjust flattening pressure before baking; gently pressing dough balls thinner yields crispier cookies, while less flattening keeps them soft and thick.