 Pin It
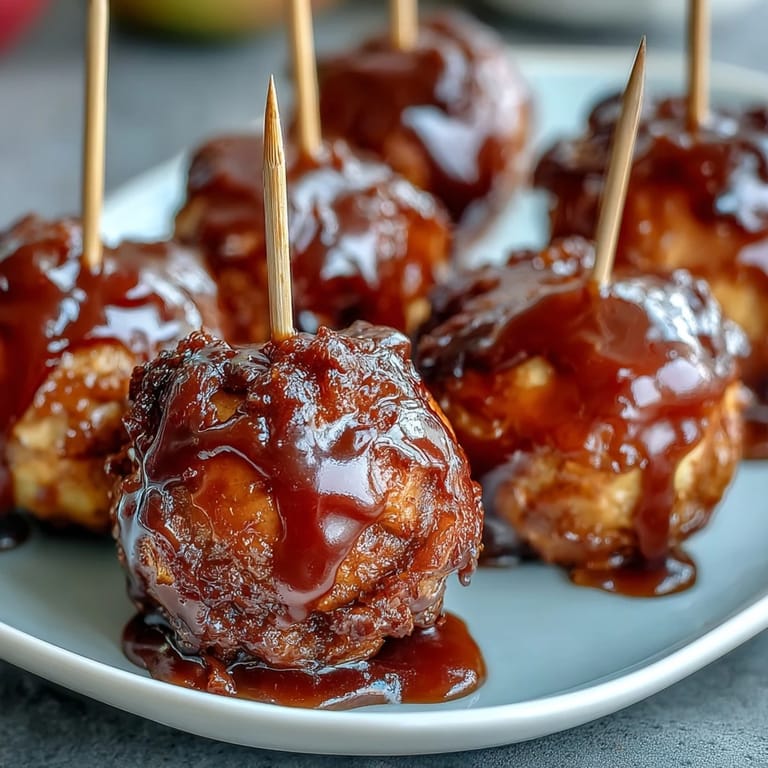
 My neighbor brought a plate of these to a summer block party, and I watched people gravitate toward them like they were made of pure magic. The glossy red coating caught the afternoon sun, and when someone bit into one, that satisfying crack echoed across the patio. I spent the rest of the evening asking for the recipe, partly because they tasted like a carnival in miniature, but mostly because I wanted to recreate that moment of pure joy on a stick.
Last autumn, I made these for a PTA bake sale and honestly didn't expect much—they're so easy I worried they'd feel too casual. But something magical happened: people lined up specifically for the apple bites, and one mom asked if she could order two dozen for her daughter's Halloween party. That's when I realized it's not always about complexity; sometimes the most memorable things are the ones that taste like childhood and feel like a small indulgence.
Ingredients
- Crisp apples (Granny Smith or Fuji): Choose ones that are firm and tart so they don't get mushy when you core them, and the tartness plays beautifully against the sweet candy shell.
- Granulated sugar: This is your candy base, and you'll want pure white sugar so the red coloring shows up vibrant and true.
- Light corn syrup: This keeps your candy from crystallizing and gives it that glossy, smooth finish that looks professionally made.
- Water: Just enough to start the candy cooking; you'll lose it all to steam as you reach that hard-crack stage.
- Red food coloring: Added at the last moment so the heat doesn't fade it, and it keeps the color bright and inviting.
- Nonstick cooking spray: A thin spray on parchment saves you from chasing hardened candy bits across your countertop later.
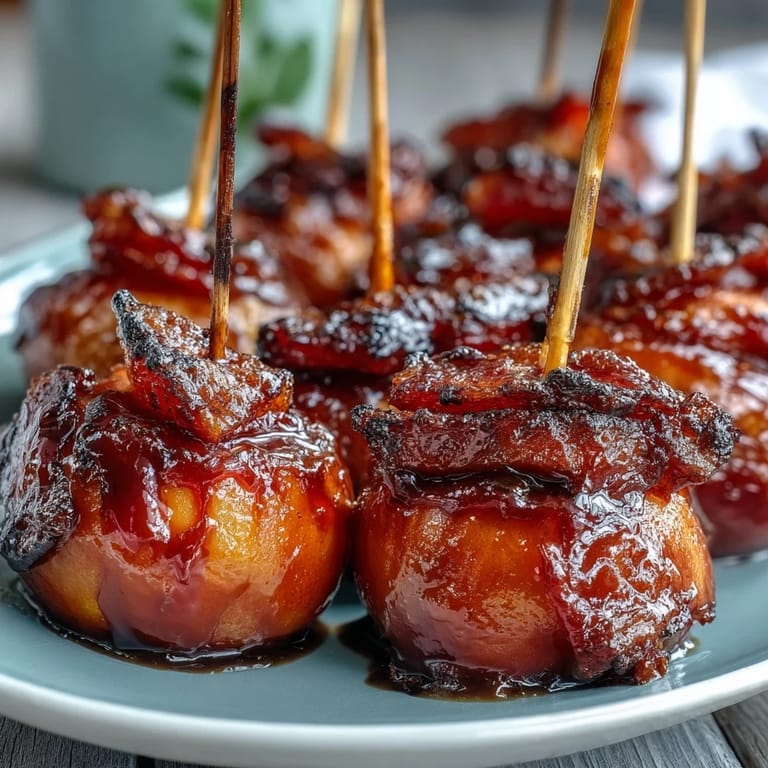
- Optional toppings: Chopped nuts, mini chocolate chips, or sprinkles go on while the candy is still tacky and warm, so they stick without any extra adhesive.
Tired of Takeout? 🥡
Get 10 meals you can make faster than delivery arrives. Seriously.
One email. No spam. Unsubscribe anytime.
Instructions
- Set your stage:
- Line a tray with parchment and give it a light spray of nonstick spray—you want just enough so things don't stick, but not so much that it pools and gets slippery. This is your landing pad for the hot candy-coated apples.
- Prep the apples:
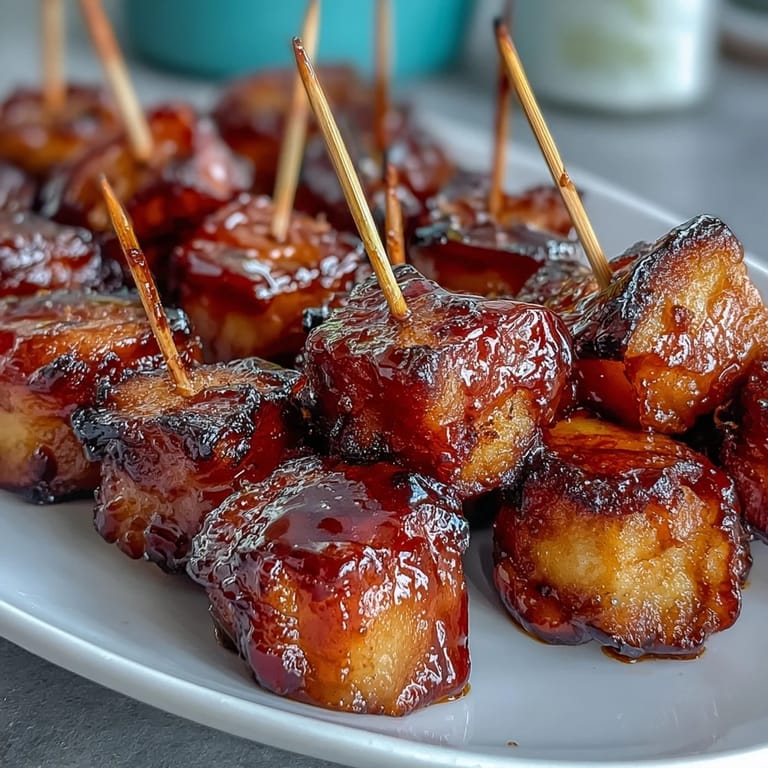
- Core your apples and cut them into roughly 1-inch chunks, then pat them completely dry with paper towels—moisture is candy's enemy and will make it slide right off. Insert a toothpick into each piece and arrange them on a plate so you're not fumbling when the candy reaches temperature.
- Make the candy:
- Combine sugar, corn syrup, and water in a saucepan and stir until it looks like wet sand. Once it boils, resist the urge to stir—just let it bubble away peacefully over medium-high heat while you watch the thermometer climb toward 300°F, which should take about 7 to 8 minutes.
- Reach hard-crack stage:
- The moment your thermometer hits 300°F, you'll have that magical hard-crack stage where the candy will be glossy and snap when it cools. Pull it off heat immediately and stir in your red food coloring quickly—the residual heat will distribute the color beautifully.
- Dip with confidence:
- Work quickly here because the candy sets fast; grab an apple chunk by its toothpick and swirl it in the hot coating, letting excess drip back into the pan. Place it on your prepared tray and if you're using toppings, sprinkle them on right away while the candy is still slightly tacky.
- Let it set:
- Leave everything at room temperature to cool and harden completely—don't put them in the fridge or they'll get sticky and sad. Once they're fully set, they're ready to serve and will stay crisp for hours.
 Pin It
 I made a batch for my daughter's school fundraiser, and one of the teachers told me later that a shy kid who rarely participated in social events stood by the dessert table with a plate of these, eating slowly and actually talking to other kids. Sometimes you don't realize a simple snack can be a bridge between people, but that day it was.
The Science Behind the Shine
The glossy, glass-like finish comes from reaching that specific 300°F temperature—that's the hard-crack stage, where the sugar molecules lock into a rigid structure that snaps satisfyingly when you bite into it. If you undershoot and only get to 270°F, you'll end up with a softer, chewier coating that's honestly less impressive. Go too far past 300°F and the candy starts to burn, turning from red to an angry brown and tasting slightly bitter instead of purely sweet.
Why Fresh Apples Matter
A mealy or soft apple will collapse under the weight of the hot candy and turn into mush inside that pretty shell—nobody wants that surprise. Granny Smith apples are ideal because they're naturally tart and firm enough to hold their shape, though Fuji apples work too if they're really fresh. The tartness is also your secret weapon because it cuts through the sweetness of the candy and prevents each bite from feeling one-note or cloying.
Making It Your Own
Once you understand the basic technique, you can play with colors and toppings endlessly—green food coloring for a Christmas version, or even clear candy with pearl dust for an elegant look. The beauty of this recipe is that it's simple enough to teach someone else how to make it, but personal enough that each batch feels like it came from your kitchen specifically. I've seen people crush candy canes and sprinkle them on for a peppermint version, or use edible gold flakes for a fancy party.
- Try substituting a quarter of the corn syrup with honey for a slightly different flavor profile and a touch of sophistication.
- If you don't have a candy thermometer, you can use the cold water test, though a thermometer is genuinely more reliable and removes the guesswork.
- These stay fresh in an airtight container at room temperature for several days, so you can make them ahead without stress.
 Pin It
 There's something deeply satisfying about taking something as ordinary as an apple and transforming it into something that looks like you spent hours in a candy kitchen. These little bites remind me that sometimes the most impressive things are the ones made with the fewest ingredients and the most careful attention to one simple moment—like watching sugar turn to glass.
Recipe Questions & Answers
- → What apples work best for these bites?
Crisp varieties like Granny Smith or Fuji are ideal due to their firm texture and tart-sweet balance that complements the candy coating.
- → How do I know when the candy coating is ready?
Bring the sugar mixture to a hard crack stage at about 300°F. Using a candy thermometer ensures the coating will harden properly.
- → Can I add toppings to these bites?
Yes, immediately after dipping, sprinkle chopped nuts, mini chocolate chips, or sprinkles before the coating sets for extra flavor and texture.
- → How should I prepare the apples before coating?
Core and cut apples into 1-inch chunks, pat dry thoroughly to help the candy adhere and prevent slipping on the toothpicks.
- → What safety tips should I follow when working with hot candy?
Exercise caution as the sugar mixture reaches very high temperatures. Use appropriate tools and avoid touching hot syrup directly.
- → Can I use different food coloring for a twist?
Absolutely, swapping red for green or other colors adds variety and visual appeal without affecting flavor.