 Pin It
 The first time I made these whimsical flower pot brownies, the kitchen was alive with a sweet, chocolaty aroma that seemed to promise something playful. I remember turning up my favorite playlist, setting out the mini flower pots, and feeling a flicker of excitement—there’s just something joyful about tiny desserts in unexpected shapes. The clatter of Oreos in the food processor and the soft hiss of cream being whipped made the atmosphere feel festive, not fussy. There was flour dust on my shirt and a hopeful sense that, just maybe, these would become a new favorite. And when the brownies emerged rich and fudgy, I knew I was onto something truly special for Mother's Day.
One spring, I whipped these up for a Mother’s Day picnic in the backyard, laughter carrying across the grass as we discovered the surprise beneath the “dirt.” Watching my family’s delighted confusion as they tapped the Oreo topping and unearthed rich brownies beneath felt like orchestrating a magic trick with dessert. The dog hovered nearby, curious about the edible petals on each pot. My mom admitted she almost felt bad scooping out something so pretty. That moment reminded me that a little extra creativity in the kitchen creates lasting smiles far beyond the final bite.
Ingredients
- Unsalted butter: Using good-quality butter gives the brownies that luxurious mouthfeel and helps carry the cocoa flavor; let it melt gently for the best texture.
- Granulated sugar: Don’t skimp—this balances the cocoa’s bitterness and helps create a crinkly top to the brownies.
- Eggs: They make the brownies rich and fudgy; let them come to room temperature for smoother mixing.
- All-purpose flour: Just enough to hold everything together without making the brownies cakey; don’t overmix.
- Unsweetened cocoa powder: This is where most of your chocolate punch comes from—use a dark, high-quality one if you can.
- Baking powder: A small lift keeps the brownies from turning dense bricks—trust me, I’ve learned the hard way.
- Salt: Just a pinch pulls all the flavors into balance.
- Vanilla extract: Adds softness and depth to the chocolate; real extract shines here.
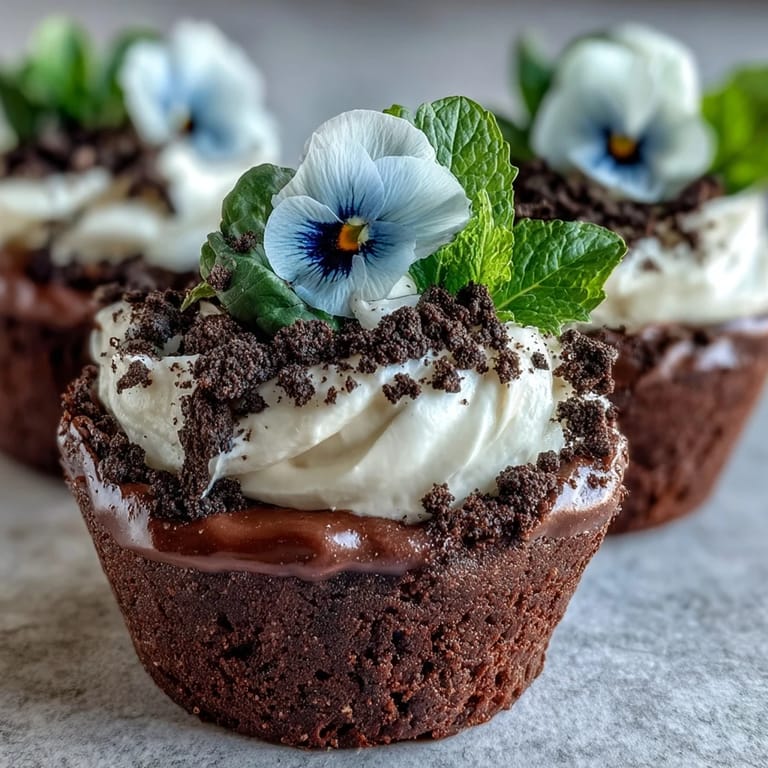
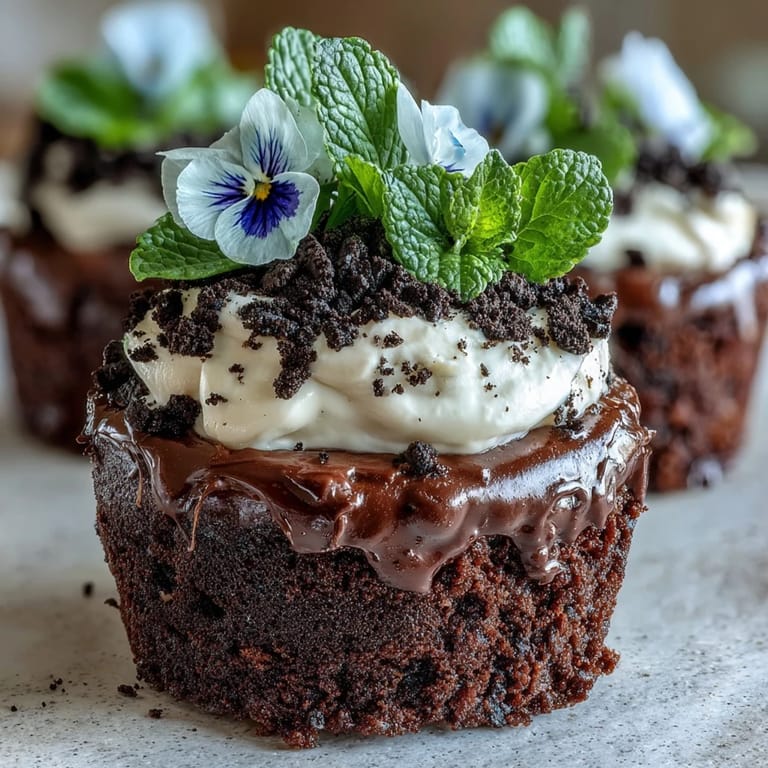
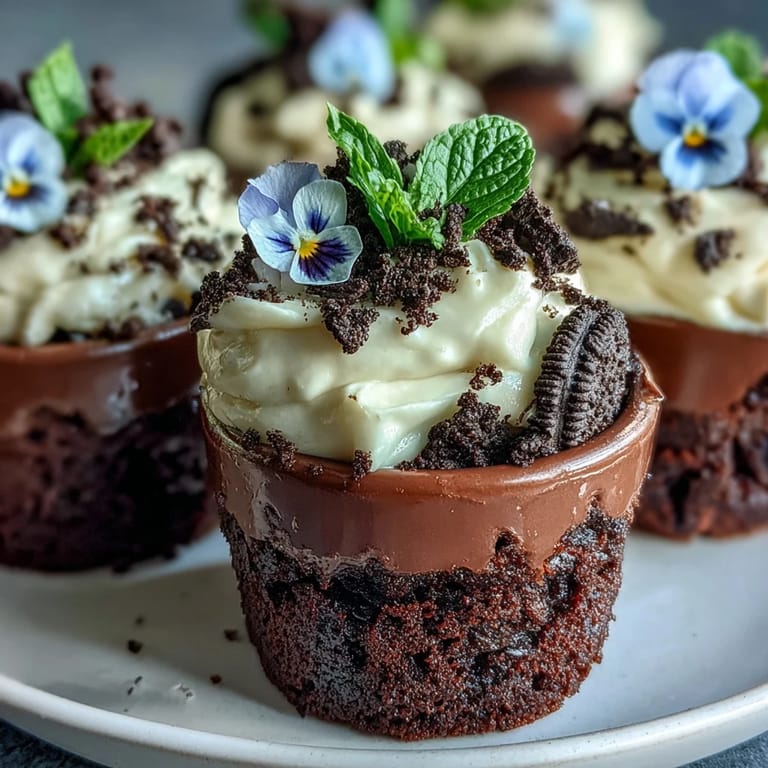
- Oreo cookies: The star of the "dirt" layer; crushing them with filling intact gets the most “garden soil” look.
- Heavy cream: Whipping this makes a pillowy layer that counters the rich brownies.
- Powdered sugar: Sweetens the whipped cream without graininess; sifting first makes all the difference.
- Edible flowers or gummies: The magical finishing touch—make sure your flowers are truly edible and unwaxed.
- Mint leaves (optional): These add a fresh, springy aroma and a pop of green.
Tired of Takeout? 🥡
Get 10 meals you can make faster than delivery arrives. Seriously.
One email. No spam. Unsubscribe anytime.
Instructions
- Prepare your pots and preheat:
- Set your oven to 175°C (350°F) and get your mini flower pots ready with parchment discs if needed, or line a pan instead.
- Melt and mix the base:
- Melt the butter over gentle heat, then whisk in your sugar and vanilla; the mixture should look glossy and smell like a chocolate shop.
- Add the eggs:
- Stir in one egg at a time, whisking after each until the batter feels silky and thick.
- Sift and fold:
- Combine your flour, cocoa, baking powder, and salt, then fold gently into the wet mix—dark streaks mean you’re almost done.
- Fill the pots:
- Spoon the batter evenly into your flower pots or baking pan, scraping the sides for every last bit.
- Bake and cool:
- Bake 20–25 minutes until a toothpick comes out with moist crumbs; let the brownies cool completely before moving on.
- Make the dirt:
- Crush the Oreos (filling included) into fine crumbs—either zip bag and rolling pin or a quick pulse in the processor works.
- Whip the cream:
- Beat the heavy cream with powdered sugar until it holds sturdy peaks; cool cream whips up the fastest.
- Shape and layer:
- If you baked in a tray, cut brownies to fit your pots, then layer a generous dollop of whipped cream atop each brownie base.
- Top with dirt:
- Scatter Oreo crumbs thickly over the cream, encouraging them to resemble moody garden soil.
- Make it bloom:
- Finish each pot with edible flowers, gummies, and maybe a sprig of fresh mint for flair.
- Chill until serving:
- Pop the flower pots into the fridge to chill until it’s time to serve your edible gardens.
 Pin It
  Pin It
 Watching everyone dig in together—first with skeptical spoons, then with soft laughter as flowers toppled—turned dessert into an event, not just a course. That shared surprise and the stories that followed left me wishing I’d doubled the recipe.
How to Find and Prepare Edible Flowers
Edible flowers can feel intimidating, but I found that local farmers markets often have seasonal, food-safe blossoms perfect for dessert. A gentle rinse and careful patting dry keep the petals perky, and if you’re unsure of a flower’s edibility, skip it—when in doubt, stick with trusted varieties like violets, pansies, or nasturtiums.
Making These Ahead Without Losing the 'Wow'
If you want to get ahead, bake the brownies and crush the Oreos the night before, but only whip the cream and decorate a few hours before serving—flowers hold their color best when added at the last minute. Chilling the assembled pots keeps everything fresh and gives the flavors time to cozy up together.
Troubleshooting Tips for Flower Pot Brownies
I’ve had brownies stick to pots when I skipped the parchment or didn’t grease well, so don’t get lazy on the prep work. If your cream won’t whip, chances are the bowl or cream was too warm, so chill both next time for fluffy results. Remember, whipping cream past stiff peaks quickly turns it to butter—so stop mixing as soon as it stands firm.
- Wipe pot edges clean before serving for the prettiest presentation.
- Let kids help with the “dirt” layer for extra fun (and a little kitchen chaos).
- Bring out the chilled pots just before dessert for the best texture and surprise reveal.
 Pin It
  Pin It
 May your Mother’s Day be filled with treats as beautiful as these—and may your kitchen always be a place to try something unexpected together.
Recipe Questions & Answers
- → Can I bake in real flower pots?
Yes—use only mini oven-safe ceramic pots and line the bottoms with parchment for easy removal. If unsure, bake in a tray and cut to fit the pots after cooling.
- → How do I make the Oreo 'dirt'?
Place whole Oreo cookies in a food processor and pulse to fine crumbs, including the filling. Alternatively, seal in a bag and crush with a rolling pin until sandy in texture.
- → How do I keep whipped cream stable?
Chill the bowl and beaters before whipping, use cold heavy cream, and whip to stiff peaks. Adding a small amount of powdered sugar helps stabilize the cream for assembly.
- → Can I use store-bought brownies?
Absolutely. Bake-bought brownies work well—trim to size for the pots, then proceed with whipped cream, Oreo crumbs, and decoration.
- → Are edible flowers safe to use?
Only use flowers labeled food-safe from trusted sellers. Rinse gently, avoid flowers treated with pesticides, and consider gummies or mint as decorative alternatives.
- → What is the best way to store these?
Keep assembled pots refrigerated and cover loosely. Consume within 24–48 hours for best texture; whipped cream will soften over time and Oreo crumbs may absorb moisture.