 Pin It
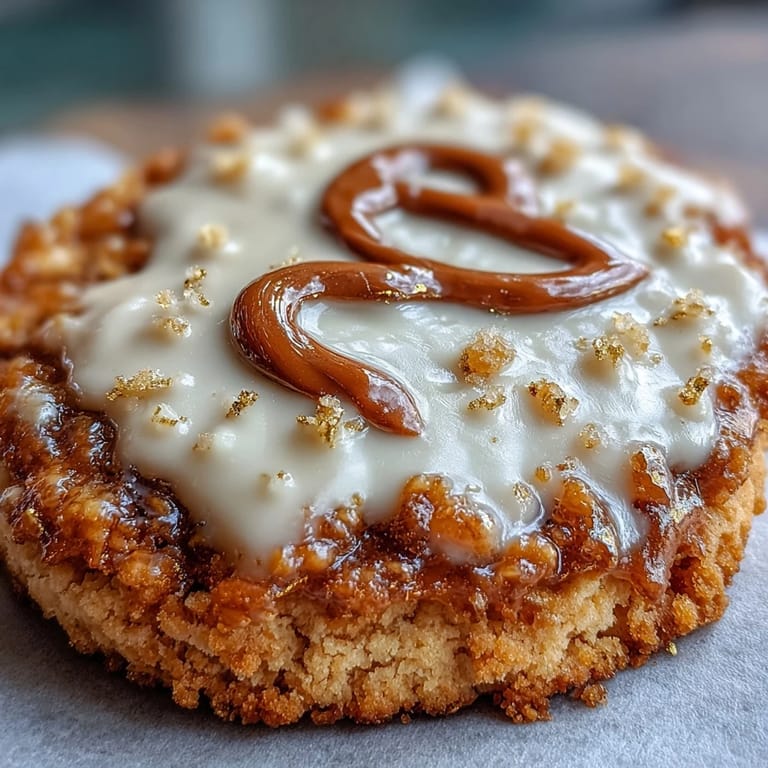
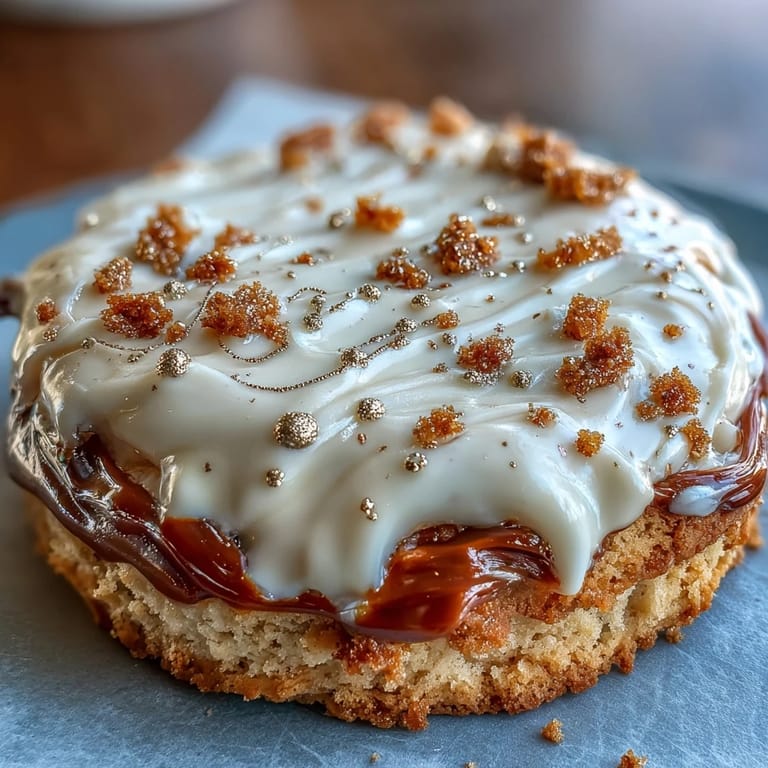
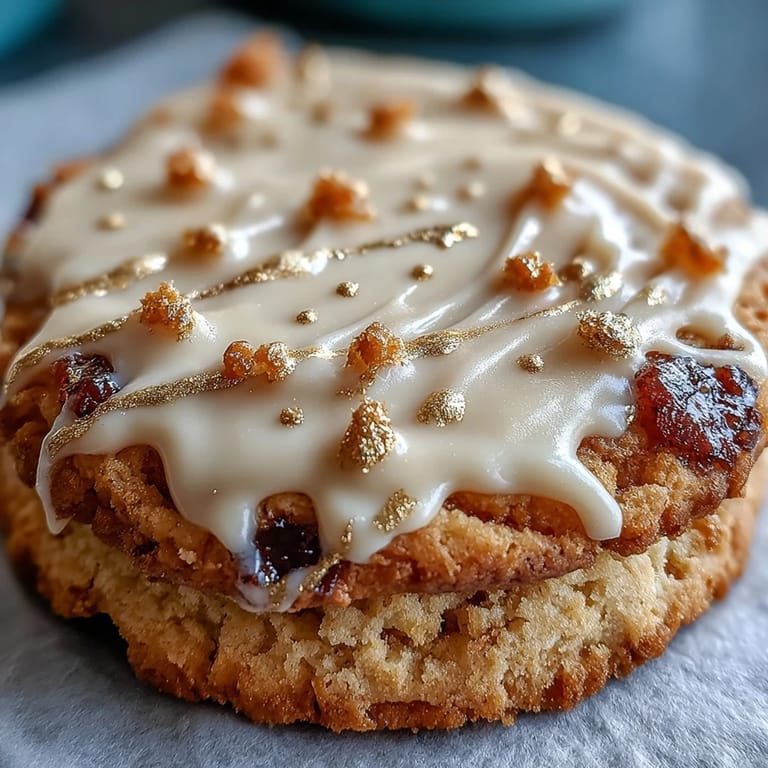
 It still makes me grin to remember the first time I played with gold luster dust in the kitchen—half skeptical, wholly charmed by that magical shimmer on my fingers. The Taurus zodiac, known for its love of comfort and beauty, was the perfect inspiration for a box of cookies that felt both down-to-earth and just a little bit regal. I ended up tracing delicate Taurus horns into the icing, realizing how much the right details can elevate even the simplest treat. Baking these, the kitchen filled with the warmth of butter and vanilla, but it was the painting that turned the day golden—quite literally—with every careful stroke. Sometimes, taking your time with decoration feels nourishing in its own indulgent way.
One chilly spring afternoon, my best friend stopped by with tea and far too many questions about her star chart. As we piped shiny gold constellations onto still-warm cookies, we laughed about astrology and debated if you could capture stubborn Taurus energy in a bite. Those cookies disappeared quickly, but it was the messy gold fingerprints on our mugs that made the memory stick.
Ingredients
- All-purpose flour: The backbone of these cookies; measure carefully and don't skip the sifting for tenderness.
- Unsalted butter: Use it just softened, not melted; it sets the foundation for that classic buttery crumb.
- Granulated sugar: Creates the subtle sweetness and the perfect pale golden edge if creamed long enough.
- Large egg: This brings moisture and helps the cookies hold their shape—room temperature makes mixing a breeze.
- Pure vanilla extract: The aromatic heart; always reach for pure, not imitation, and don't be shy about the amount.
- Almond extract (optional): Just a touch brings mystery—swap for citrus zest if you want something brighter.
- Salt: Don't skip it—it keeps the sweetness in check and emphasizes the butteriness.
- Powdered sugar: Sift it well for ultra-smooth royal icing that glides on like silk.
- Egg whites or meringue powder: Your ticket to piped perfection; ensure your mixing bowl is spotless for best results.
- Lemon juice: Adds a hint of tang and keeps the icing dazzlingly white.
- Vanilla extract (for icing): A subtle echo of flavor that ties everything together.
- Edible gold luster dust: The showpiece ingredient—don't be shy, just use a gentle hand.
- Clear alcohol (vodka or lemon extract): For painting that gold without smudging the icing; it evaporates fast, leaving only shimmer.
Tired of Takeout? 🥡
Get 10 meals you can make faster than delivery arrives. Seriously.
One email. No spam. Unsubscribe anytime.
Instructions
- Mix the Cookie Dough:
- Cream the butter and sugar in your largest bowl until pale and fluffy—listen for that subtle change from gritty to creamy. Beat in the egg, vanilla, and almond extract, pausing to enjoy the rush of aromas before adding your sifted flour and salt in turns, mixing until a soft, sculptable dough forms.
- Chill and Prepare:
- Divide the dough in two, flatten into discs, and wrap well—don’t rush this step or the cookies will lose their shape. Thirty minutes in the fridge is magic; the dough becomes cool, smooth, and perfect for rolling.
- Roll and Cut:
- Dust your countertop with flour, then roll to a quarter inch thickness—listen for the gentle squeak of the pin as you work. Use Taurus or zodiac cutters and stamp out shapes, then arrange on a lined baking sheet with just enough space between to let them breathe.
- Bake to Perfection:
- Slide trays into a 350°F oven; watch the edges for that barely-there blush of gold that means they're ready. Cool them completely—impatience risks melted icing later.
- Make Royal Icing:
- Beat egg whites or meringue powder solution to soft peaks, then slowly add sifted powdered sugar—feel it transform into glossy peaks that hold their shape. Blend in lemon juice and vanilla, then transfer to piping bags; separate a portion if you want colored or metallic accents.
- Decorate with Gold:
- Outline and flood cooled cookies—trust the process and let them sit for two hours until set. Mix gold luster dust with clear alcohol, then paint symbols or constellations gently with a fine brush, marveling as each design gleams to life.
- Box and Gift:
- Layer decorated cookies in a box lined with parchment or tissue—if you have a Taurus-themed card, tuck it alongside for a thoughtful touch. Pat yourself on the back: this is a gift meant to impress.
 Pin It
  Pin It
 The first time I handed over a box of these cookies, gold constellations twinkling atop, my sister grinned and refused to eat them immediately—she called them too pretty and set them on her work desk, a sweet bit of art before breakfast. That's when I saw how baking and sharing can double as a little celebration, zodiac or otherwise.
Gilding Your Cookies Is Easier Than You Think
Handling edible gold might sound intimidating, but it’s surprisingly playful and forgiving if you use the right brush. Mix the luster dust with a few drops of clear alcohol, then dab on delicate details—there's no pressure for perfection, just aim for a satisfying shimmer that gives each cookie a personality of its own.
Troubleshooting Royal Icing
If your icing is too thick to pipe, add drops of water until it runs off the spoon in a slow ribbon; too runny, sift in a little powdered sugar and stir well. When you're worried about color bleed or lumpiness, be patient with your drying times and always use gel coloring—liquid colors can unbalance the texture fast.
Cookie Box Assembly Tips
When stacking the finished cookies, insert a clean sheet of parchment between layers so decorations stay crisp. For whimsical finishing touches, add zodiac confetti, dried flower petals, or a sprig of rosemary to the box if you’re gifting. These small extras make unboxing as joyful as the first bite.
- Let icing dry overnight for extra insurance against smudges.
- For vibrant Taurus vibes, use pink or green icing details in addition to gold.
- Remember to check for nut allergies if gifting with almond extract in the recipe.
 Pin It
  Pin It
 Let these cookies remind you that even the most elegant treats are made better with laughter, a little mess, and someone to share them with. Happy baking—may your kitchen fill with all things golden and sweet.
Recipe Questions & Answers
- → How long should the dough chill before rolling?
Chill for at least 30 minutes; an hour is ideal. Cold dough rolls more cleanly and holds shape better during cutting and baking.
- → What consistency should the royal icing be for flooding?
For flooding aim for a 10–15 second flow on a spoon test (runny enough to level but not too thin). Use a thicker outline consistency for borders and a thinner flood for filling.
- → Can I replace egg whites in the icing?
Yes. Use meringue powder reconstituted per package directions for a shelf-stable option, or aquafaba for a vegan alternative; drying times may be a bit longer.
- → How do I apply the edible gold without ruining the icing?
Wait until royal icing is fully dry. Mix gold luster dust with a few drops of clear alcohol (vodka or lemon extract) to make a smooth paint, apply in thin layers with a fine brush, and let each layer dry before adding more.
- → How can I prevent cookies from spreading and losing detail?
Keep dough chilled, roll to an even 1/4-inch, chill cut shapes on the sheet for 10 minutes before baking, and avoid over-creaming butter and sugar to reduce excess spread.
- → What’s the best way to store and gift these cookies?
Layer cookies with parchment in an airtight box at room temperature for up to five days. For longer storage, freeze un-decorated cookies or fully dry decorated cookies wrapped individually before boxing.